How to use Xilinx Virtual Cable (XVC) with ILA
The Xilinx Virtual Cable (XVC) lets you remotely access the ILA
(A.K.A. Chipscope) via the KCU105 Ethernet (instead of using JTAG).
The XVC will let you view and interact with ILA remotely via
the same Ethernet link that you use for register access
and data streaming.
However, XVC does NOT support non-ILA debugging operations:
JTAG programming
IBERT debugging
MIG calibration results
For more information about XVC, refer to the Xilinx XVC homepage:
Note: To setup the XVC in ruckus, you will need to define
and set USE_XVC_DEBUG = 1 in your target’s makefile (Simple-10GbE-RUDP-KCU105-Example/firmware/targets/Simple10GbeRudpKcu105Example/Makefile):
# Using XVC Debug bridge
export USE_XVC_DEBUG = 1
In the firmware, you will to map UDP server port=2542 to
the surf.UdpDebugBridgeWrapper in firmware/common/rtl/Rudp.vhd:
-- UDP constants
constant UDP_SRV_SRP_IDX_C  : natural  := 0;
constant UDP_SRV_DATA_IDX_C : natural  := 1;
constant UDP_SRV_XVC_IDX_C  : natural  := 2;
constant SERVER_SIZE_C      : positive := 3;
constant SERVER_PORTS_C : PositiveArray(SERVER_SIZE_C-1 downto 0) := (
  UDP_SRV_SRP_IDX_C  => 8192,       -- SRPv3
  UDP_SRV_DATA_IDX_C => 8193,       -- Streaming data
  UDP_SRV_XVC_IDX_C  => 2542);      -- Xilinx XVC

(...)

U_XVC : entity surf.UdpDebugBridgeWrapper
   generic map (
      TPD_G => TPD_G)
   port map (
      -- Clock and Reset
      clk            => ethClk,
      rst            => ethRst,
      -- UDP XVC Interface
      obServerMaster => obServerMasters(UDP_SRV_XVC_IDX_C),
      obServerSlave  => obServerSlaves(UDP_SRV_XVC_IDX_C),
      ibServerMaster => ibServerMasters(UDP_SRV_XVC_IDX_C),
      ibServerSlave  => ibServerSlaves(UDP_SRV_XVC_IDX_C));
In the software (firmware/python/simple_10gbe_rudp_kcu105_example/_Root.py),
you will to connect the UDP client to port=2542, create a XVC server in rogue,
then connect the UDP client to the XVC server:
# Create XVC server and UDP client
self.udpClient = rogue.protocols.udp.Client( ip, 2542, False ) # Client(host, port, jumbo)
self.xvc = rogue.protocols.xilinx.Xvc ( 2542 ) # Server(port)
self.addProtocol( self.xvc )

# Connect the UDP Client to the XVC
self.udpClient == self.xvc
You will need to first start the rogue software (either GUI mode or interactive mode) to start the XVC server.
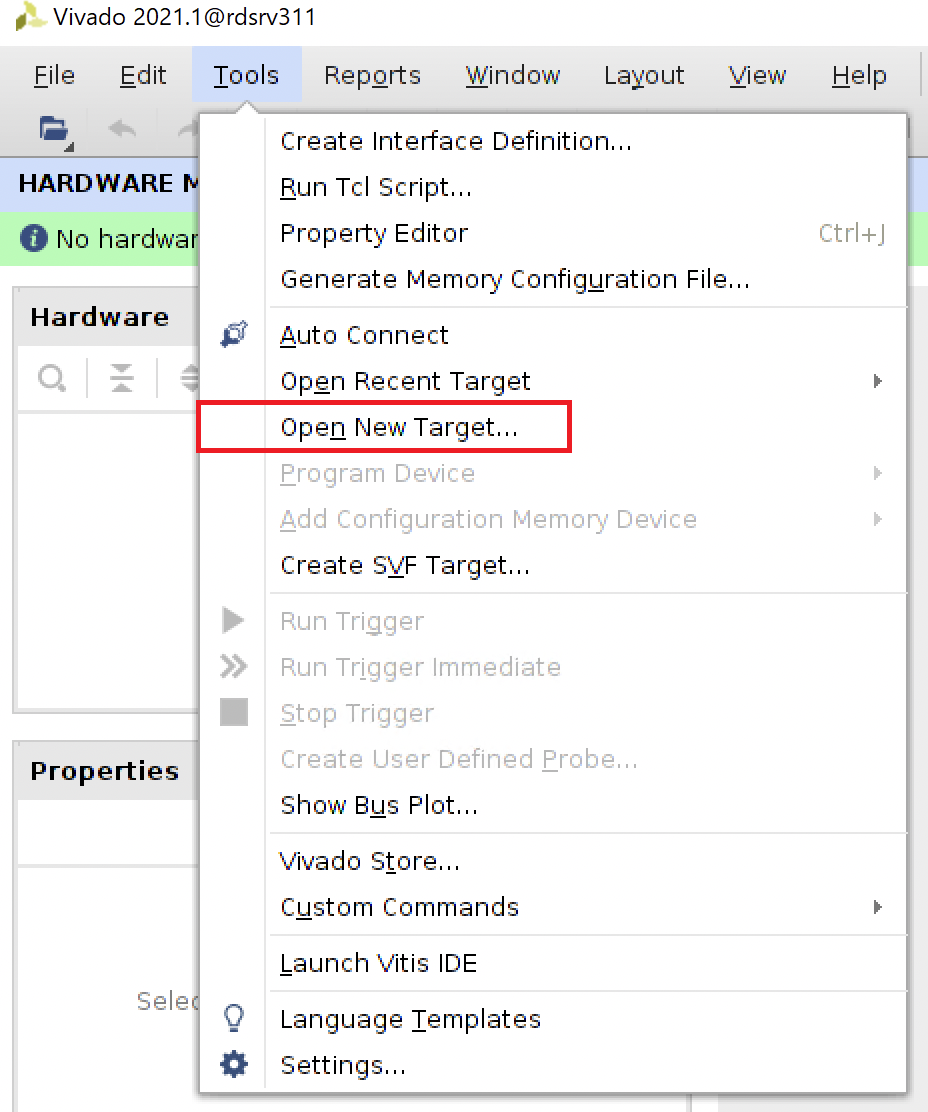
Next, from Vivado main screen, you will open Vivado Hardware Manager and open new target:
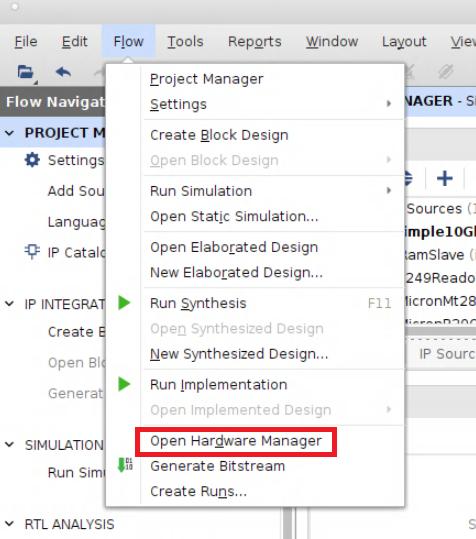
Or you can directly click on open new target:
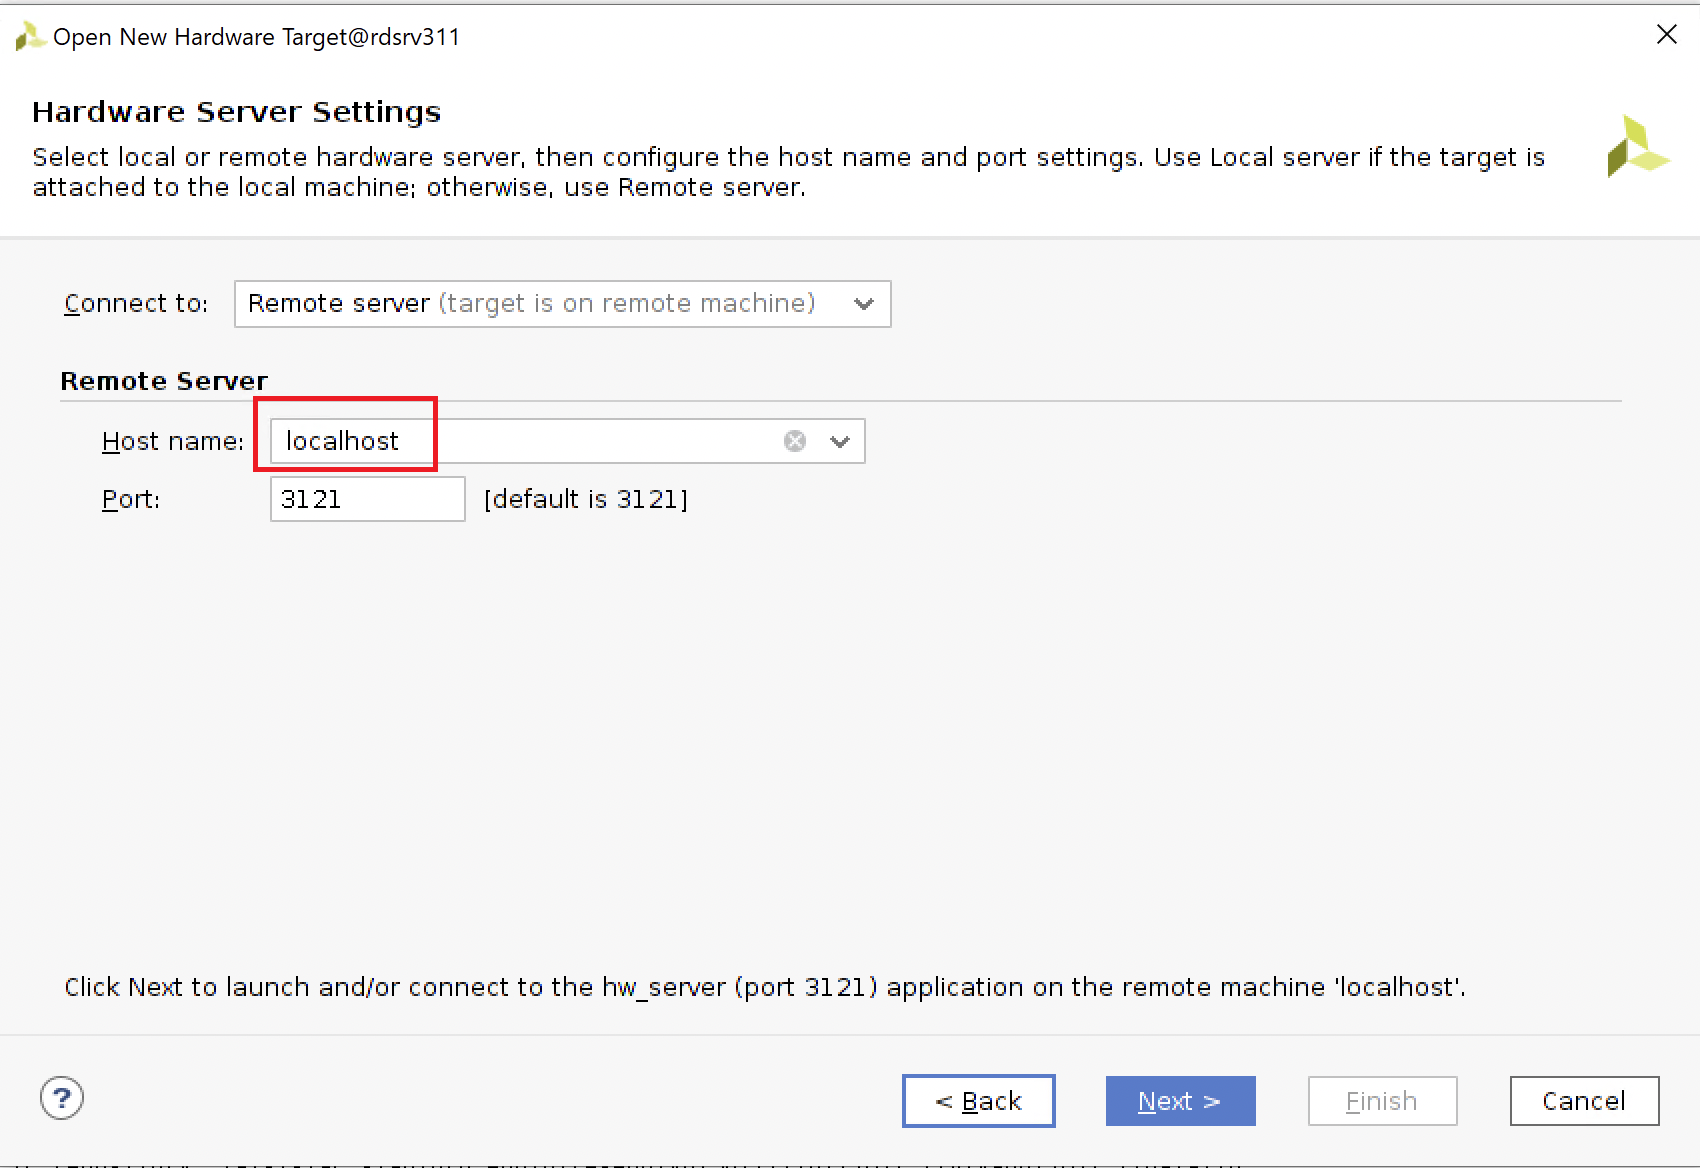
Select that you are connecting to a remote server and enter the host name.
If locally ran, then use localhost.
If running remotely for different computer, you can use IP address or PC’s hostname on your network.
Click on Add Xilinx Virtual Cable (XVC):
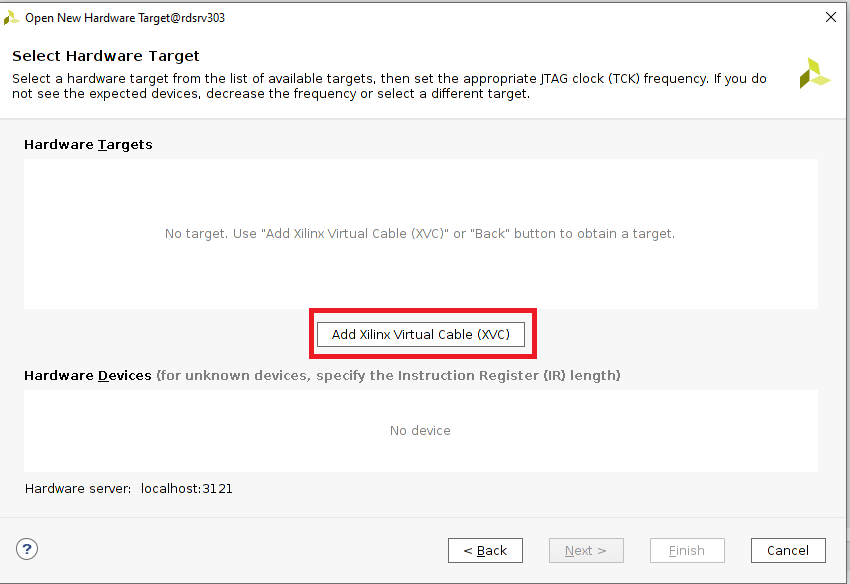
If locally ran, then use localhost for “Host Name”.
If running remotely for different computer, you can use IP address or PC’s hostname on your network.

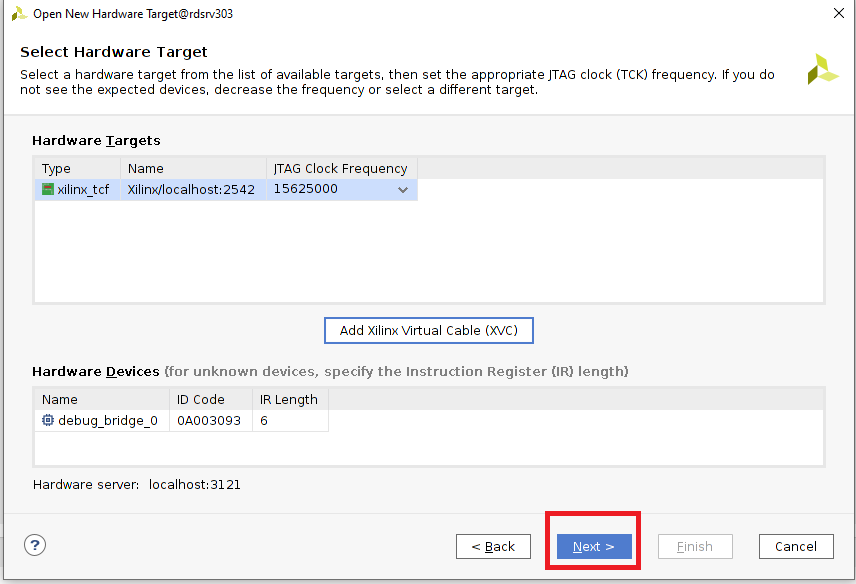
Next you will click on NEXT then click on Finished on the window after that
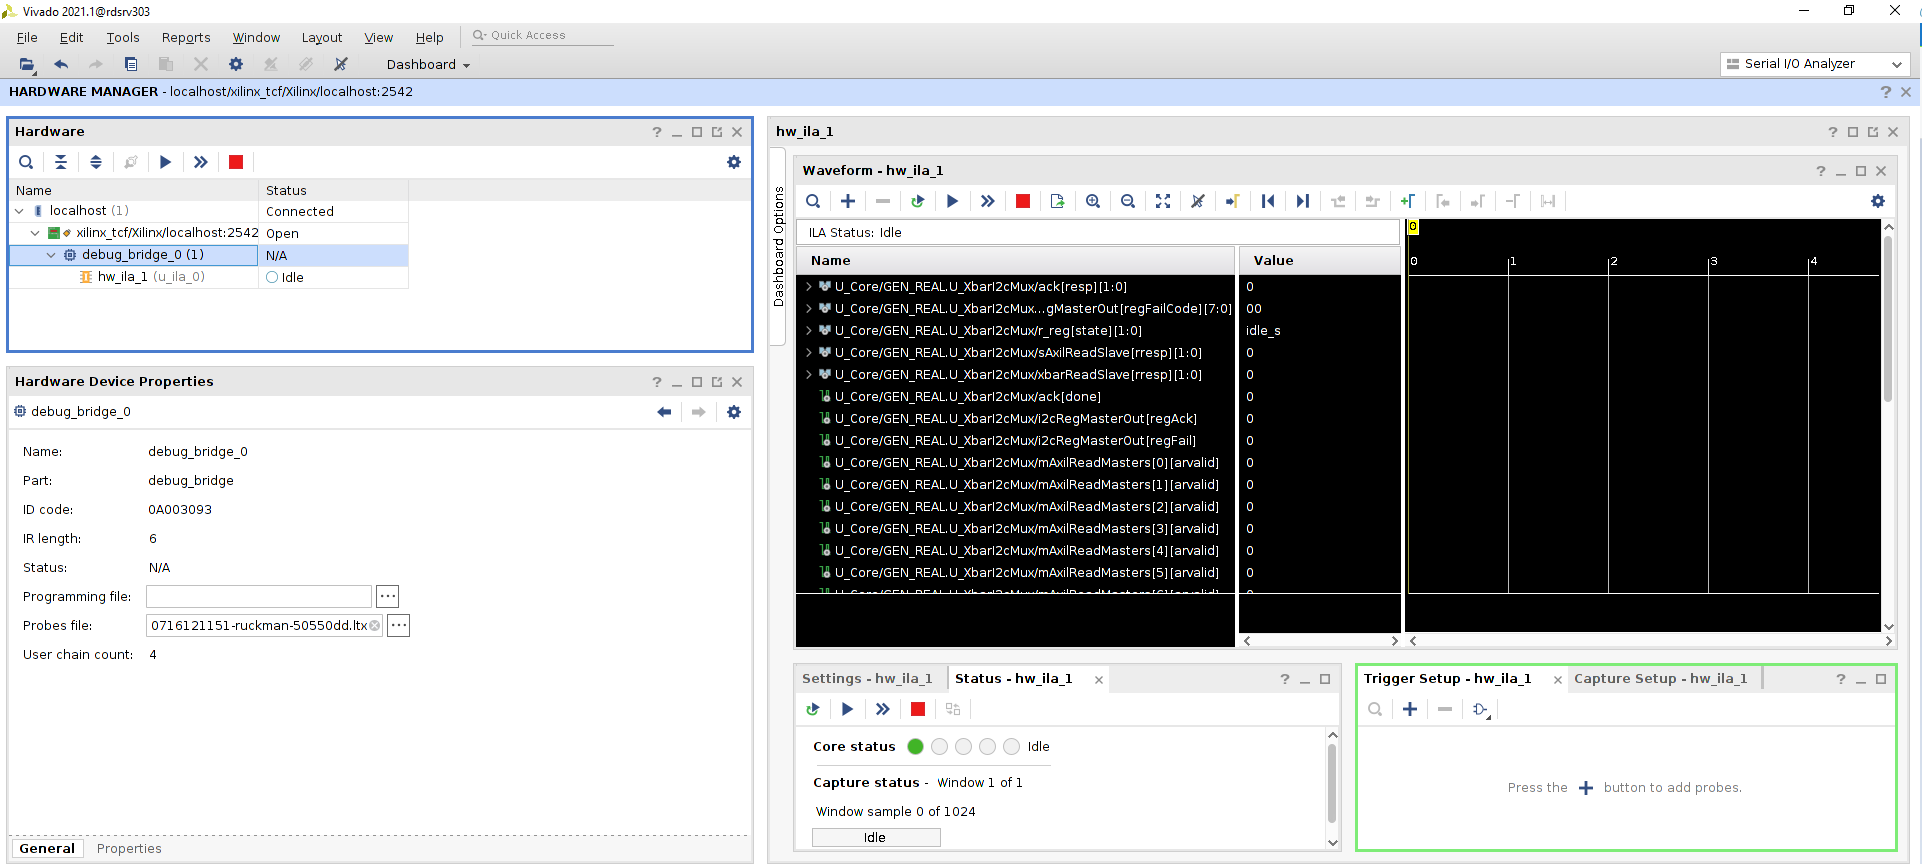
Click on “debug_bridge_0”, go to the “General Tab” and click on the ... next to “Probes File”:
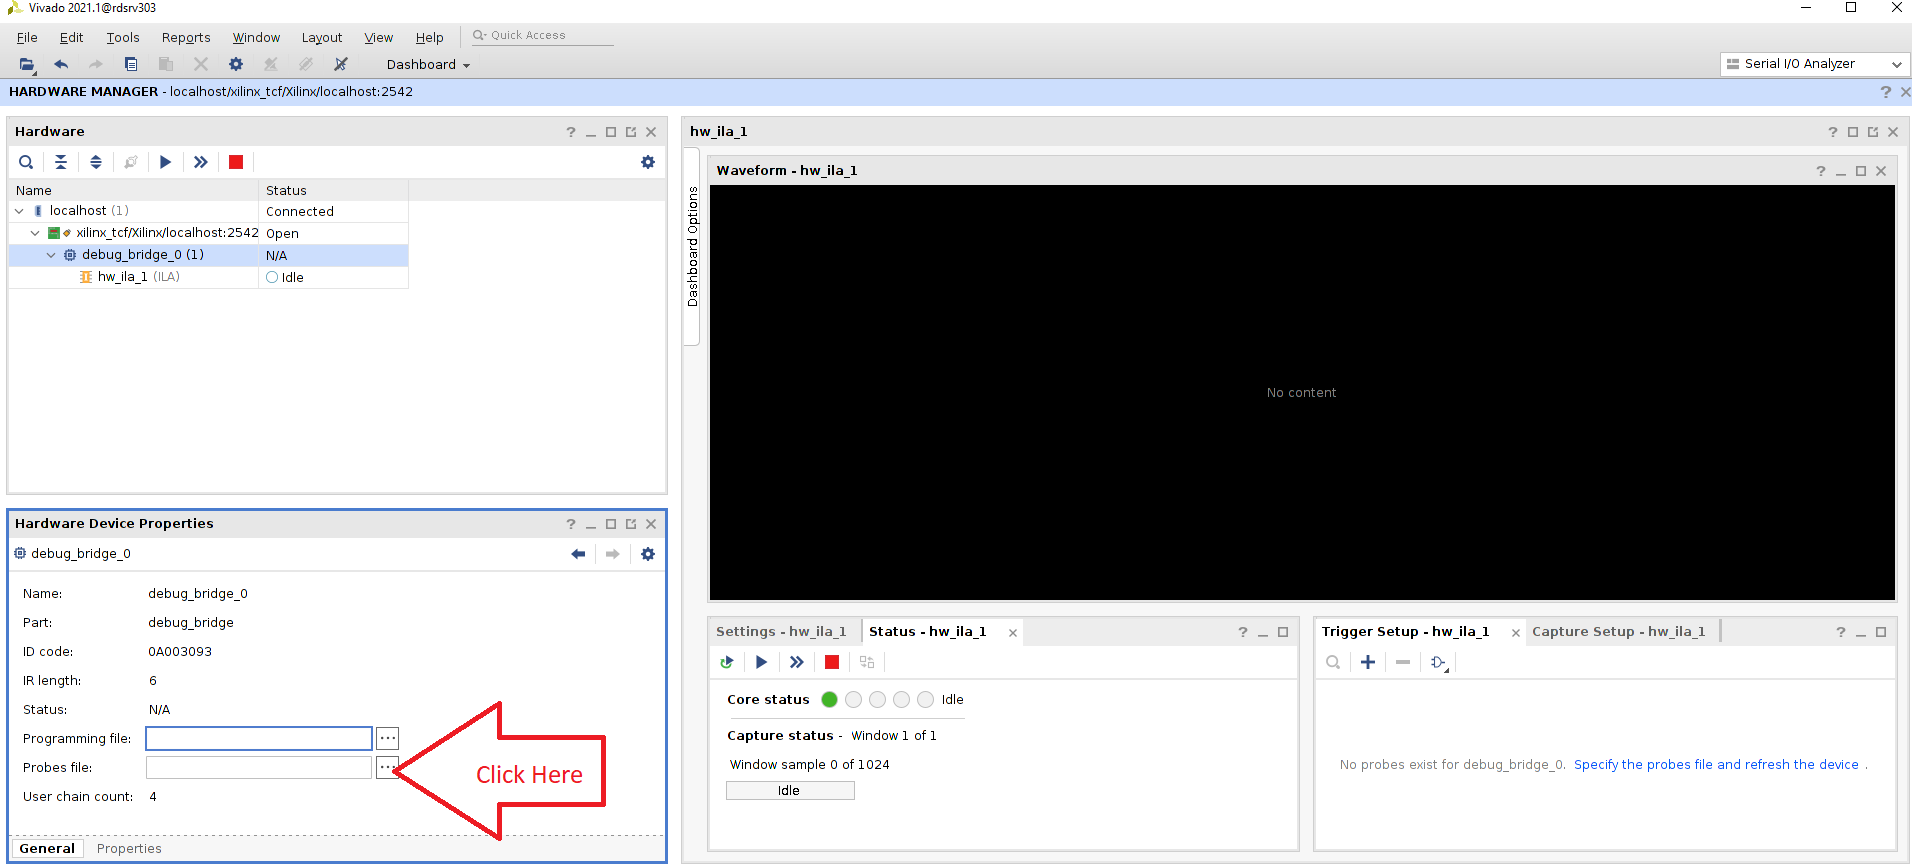
Navigate to the .ltx file that generated from your post_synthesis.tcl TCL script (refer to How to implement ILA in Vivado with ruckus).
Once the .ltx file is loaded, the ILA can now be access remotely via the Ethernet link.