colorPV
Guide
With EDM the colorPV property is often used to bring alarm coloring from a different PV. PyDM widgets do not have a specific property for a coloring/alarm Channel. The pattern to be used is to add a PyDMFrame widget and add your widget inside of it.
The PyDMFrame has a channel property in which the PV used as colorPV at EDM can be configured. This will make the inner widget be affected by the changes in Alarm associated with the PyDMFrame.
Example
For this screen, we want add alarm behavior from a PV (EDM2PYDM:VALUE) into
a line edit which uses a PV (EDM2PYDM:NOALARM) with no alarm information.
Note
This example uses an EPICS database with simulated PVs which can be downloaded at the end of this page.
Step 1.
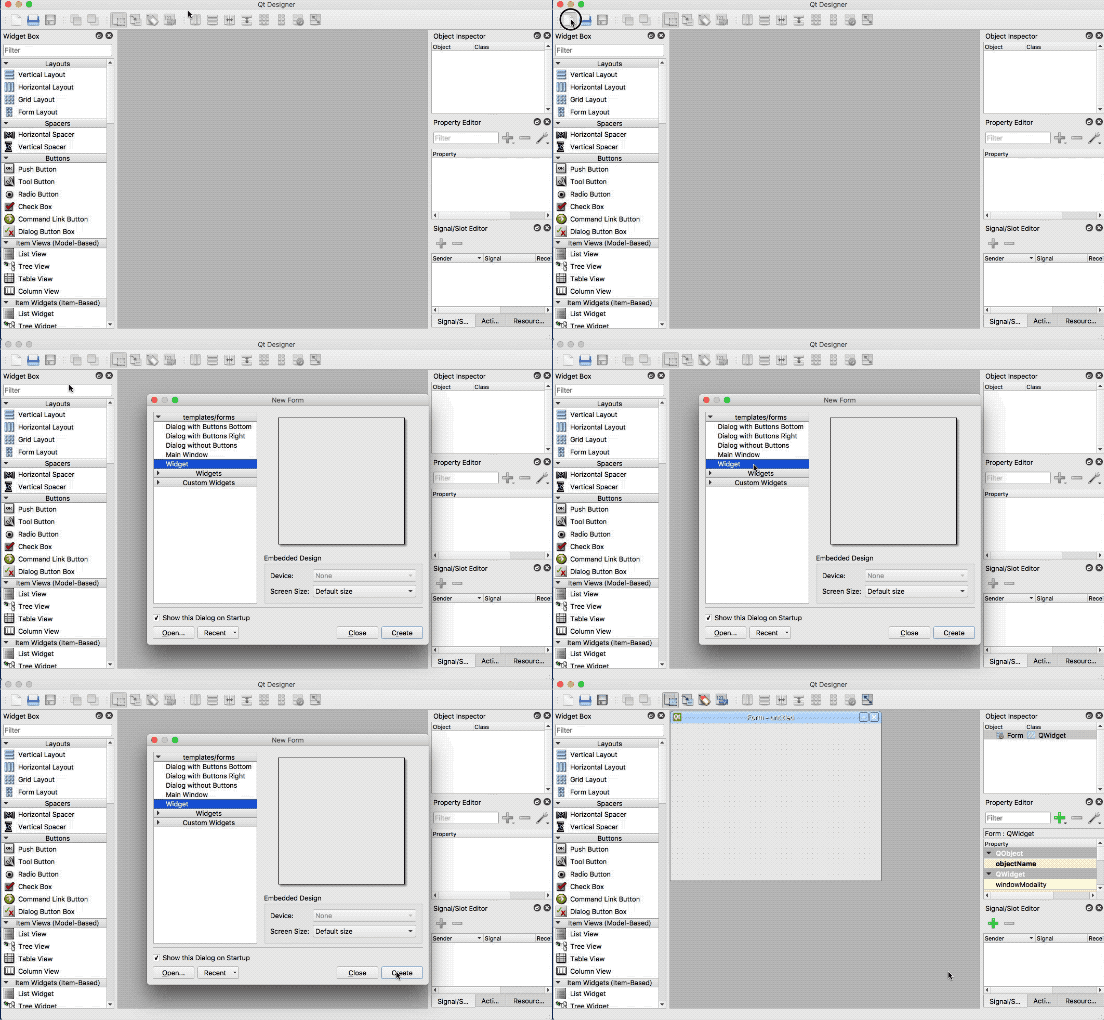
Let’s start by opening Qt Designer and creating a new
Widget.Step 2.
Now that we have our form, let’s go ahead and add the Widgets.
Step 2.1
The first widget that we will add is the PyDMFrame that will wrap our Line Edit later.
Drag and drop a
PyDMFrameinto the form created at Step 1.Make it big enough so you can fit the next widget later.
Set the
alarmSensitiveBorderproperty totrue/checked.Set the
channelproperty toca://EDM2PYDM:VALUE.
Step 2.2
Let’s add the Line Edit which will display the other PV value inside of the Frame
Drag and drop a
PyDMLineEditinto thePyDMFramecreated at Step 2.1.Set the
channelproperty toca://EDM2PYDM:NOALARM.
Step 2.3
In order to make life easier for the demonstration of this feature, let’s add a
PyDMSliderso we can control the values of the alarm PV and simulate the alarm conditions.Drag and drop a
PyDMSliderinto the form created at Step 1 below the frame (not inside of it).Set the
channelproperty toca://EDM2PYDM:VALUE.
Step 3.
Save your file (suggested name as
colorPV.ui) and test the example above.In one terminal run the example EPICS database:
softIoc -d colorPV.db
In another terminal run the example Display:
pydm colorPV.ui
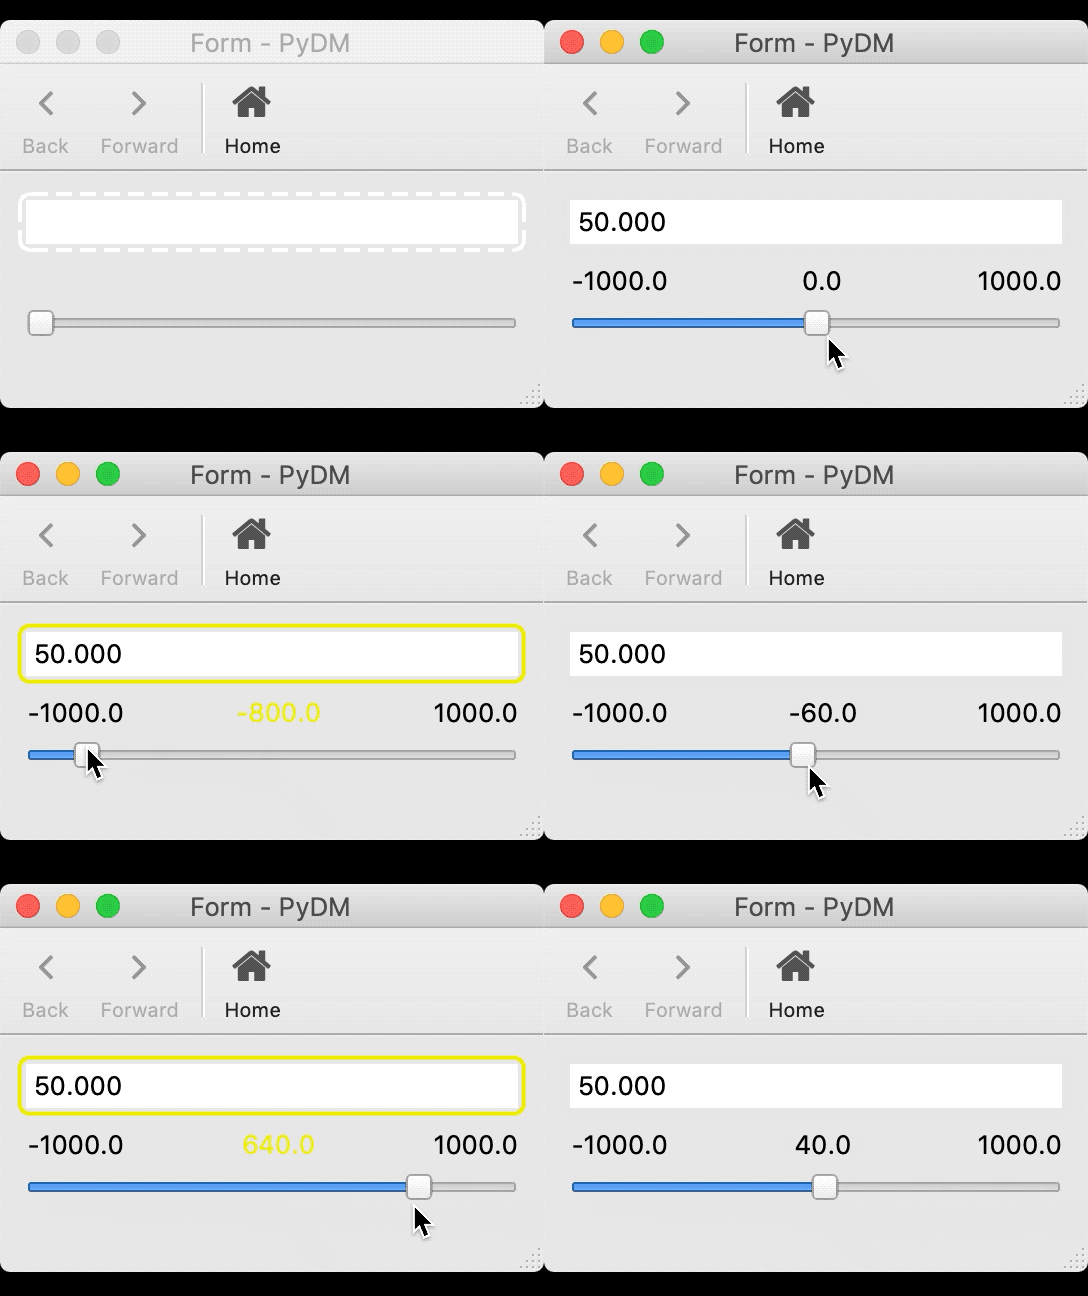
Once you move the slider the Frame will now have its border highlighted according to the stylesheet defined for alarms.
Step Bonus
You may have noticed that the PyDMFrame only applied the border to itself. That is intentionally done to preserve the look and feel of the inner widgets. But one can customize how the local PyDMFrame stylesheet property to act upon the inner widgets.
Here is an example in which we set the stylesheet at the
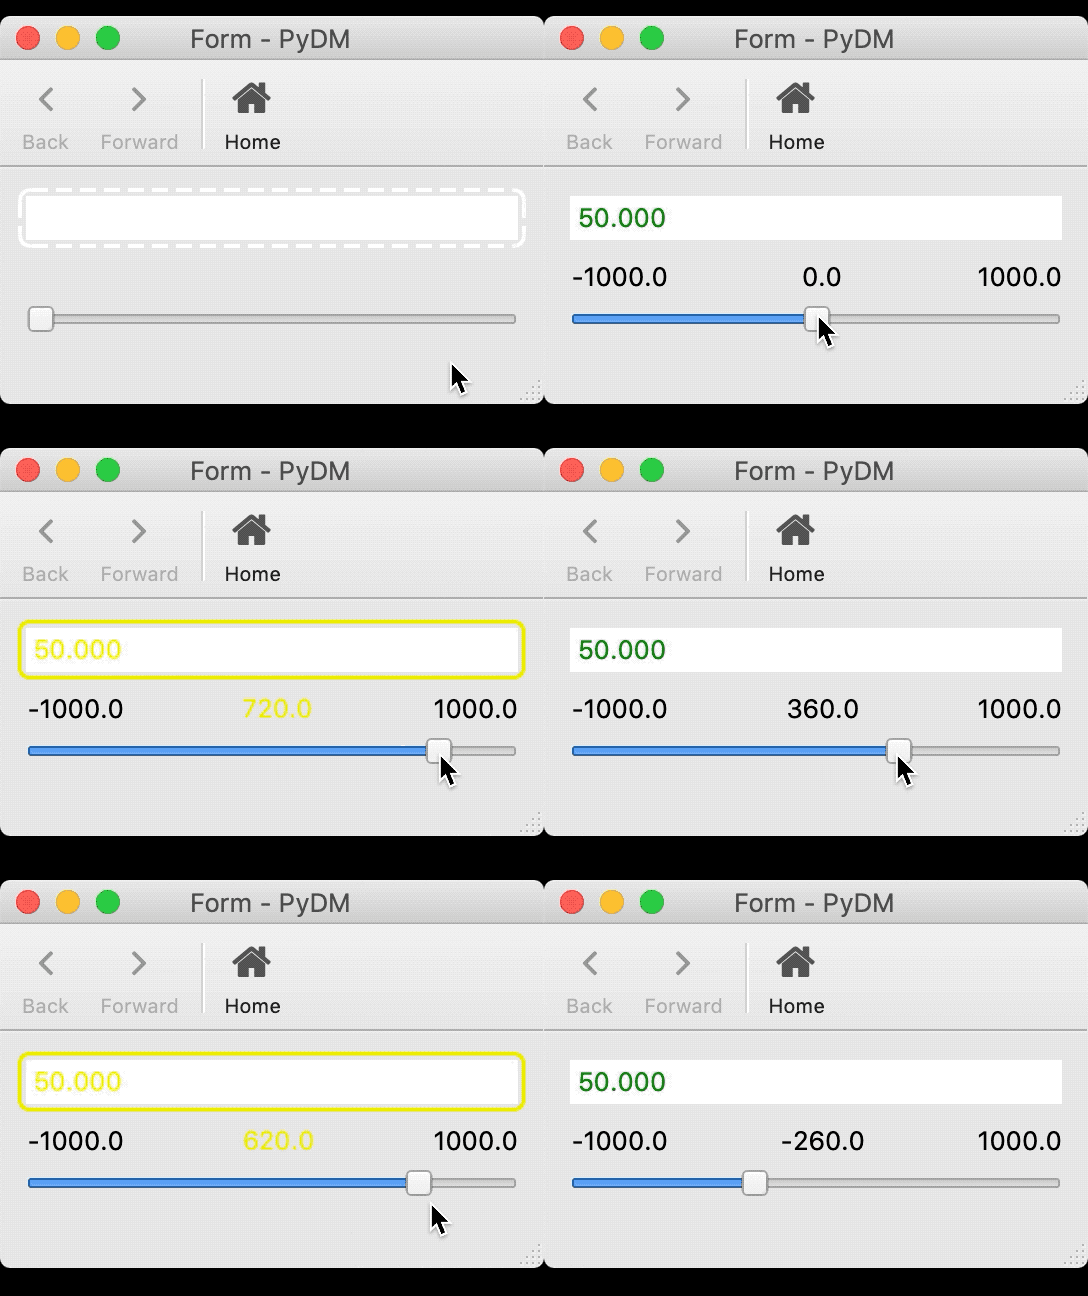
PyDMFramewidget to also change the font color of the inner widgets via thecolorproperty if the PyDMFrame has thealarmSensitiveBorderproperty checked:Set the
PyDMFramestylesheet property to the following:/* alarmSeverity 0 - No Alarm 1 - Minor Alarm 2 - Major Alarm 3 - Invalid Alarm 4 - Disconnected */ PyDMFrame[alarmSensitiveBorder="true"][alarmSeverity="0"] QWidget { color: green; } PyDMFrame[alarmSensitiveBorder="true"][alarmSeverity="1"] QWidget { color: yellow; } PyDMFrame[alarmSensitiveBorder="true"][alarmSeverity="2"] QWidget { color: red; } PyDMFrame[alarmSensitiveBorder="true"][alarmSeverity="3"] QWidget { color: purple; } PyDMFrame[alarmSensitiveBorder="true"][alarmSeverity="4"] QWidget { color: white; }
Running the colorPV.ui file with this snippet inside will produce the following result:
Note
You can download the UI file using this link
and the EPICS db file using this other link.


