Introduction to Qt Designer
Once you have PyDM installed, you can start making displays. The easiest way to make a display is to use Qt Designer, which is Qt’s drag-and-drop tool for building user interfaces.
Note
To launch the Qt Designer do:
#########
# Linux #
#########
$ designer

#########
# macOS #
#########
$ <path_to_your_bin>/Designer.app/Contents/MacOS/Designer

###########
# Windows #
###########
C:\> designer
Once you open Designer, you’ll be greeted by a mostly blank screen, with a list of widgets on the left, and a property inspector on the right.
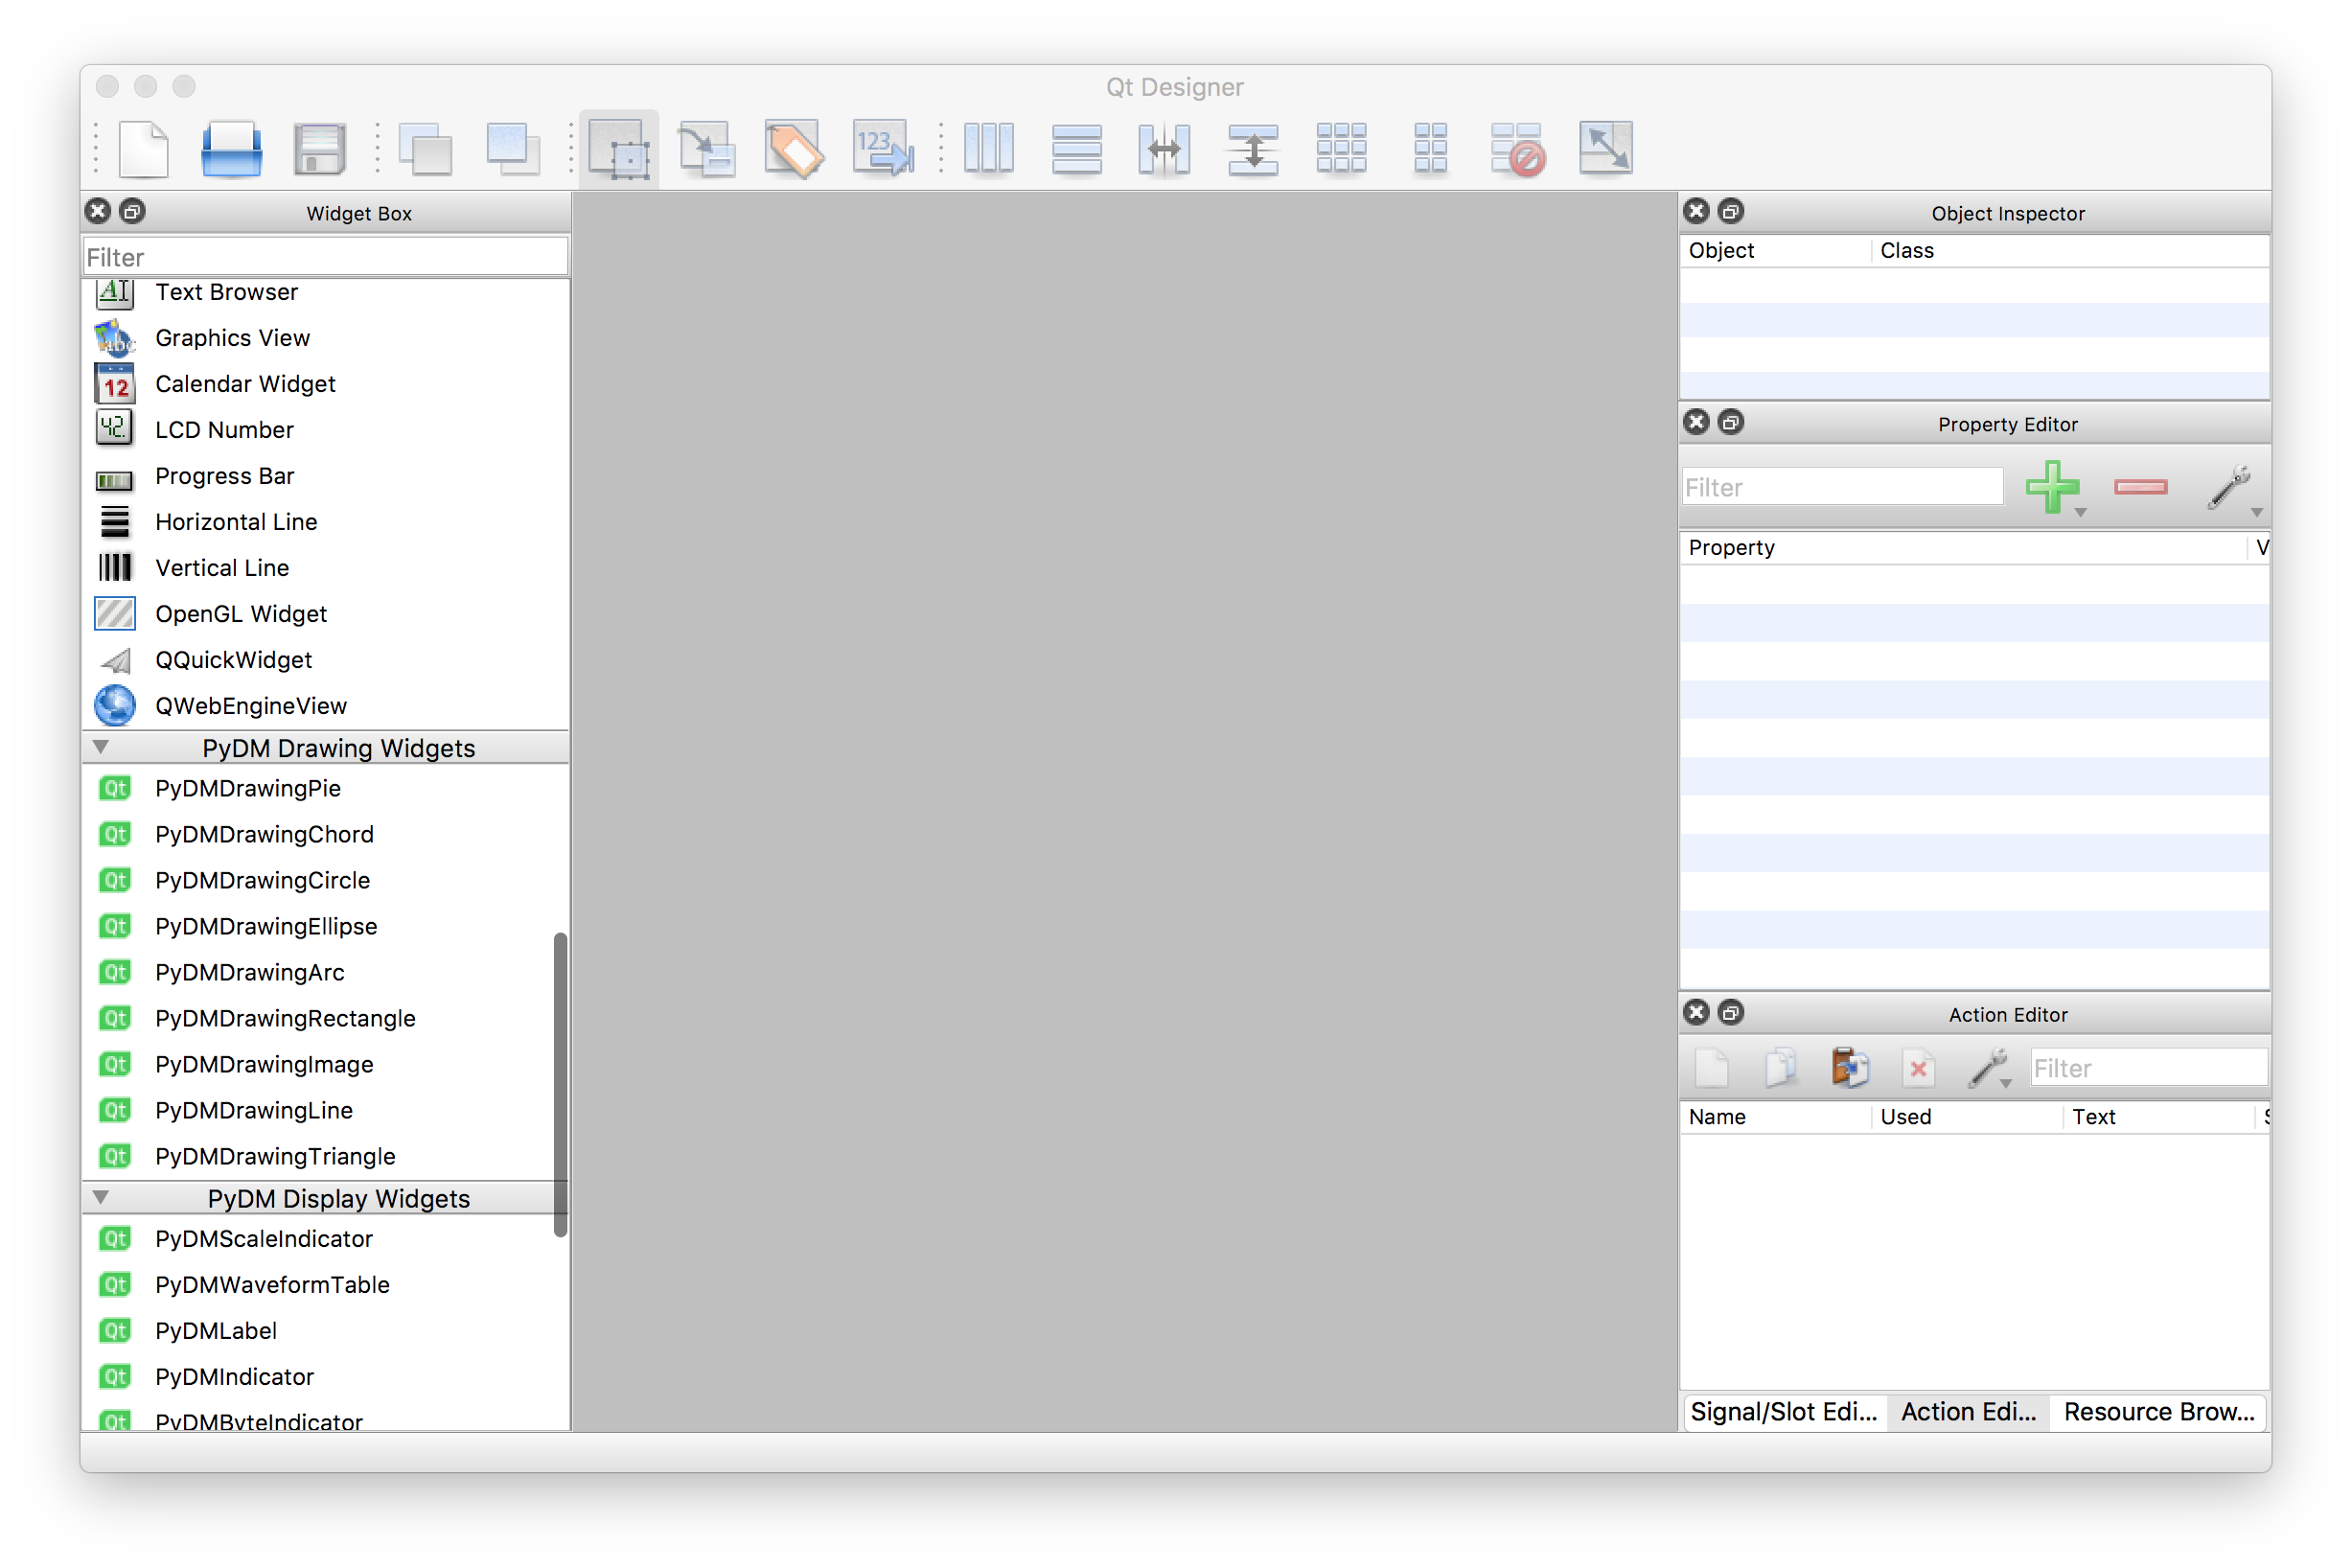
A newly-opened Qt Designer. Notice the PyDM widgets at the bottom of the widget list on the left.
To make a new PyDM display, go to File->New…, then choose to build a new Widget.
Note
All PyDM displays must have a Widget for the base - if you try to make one using a MainWindow, your display will not work properly.
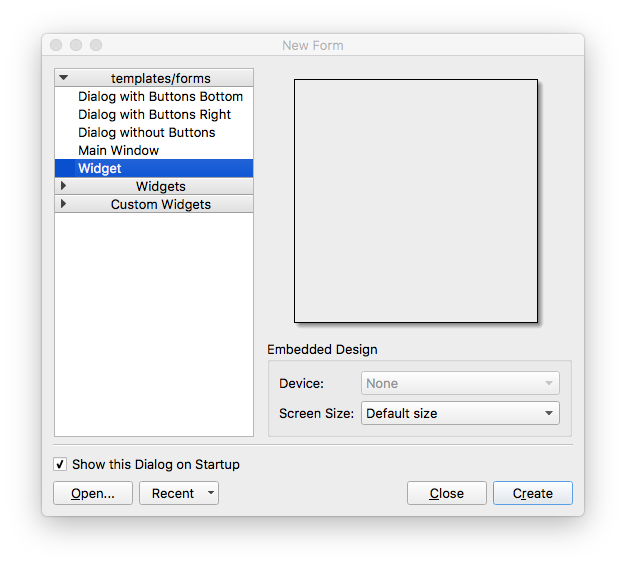
New File Dialog. Notice the Widget as the selected option.
Now you should see a blank form on which you can drag widgets. If you drag a PyDMLabel (in the ‘PyDM Display Widgets’ section) onto the form, on the right side of the screen you can see all the properties for this widget. At the bottom of the properties list are the PyDM-specific properties.
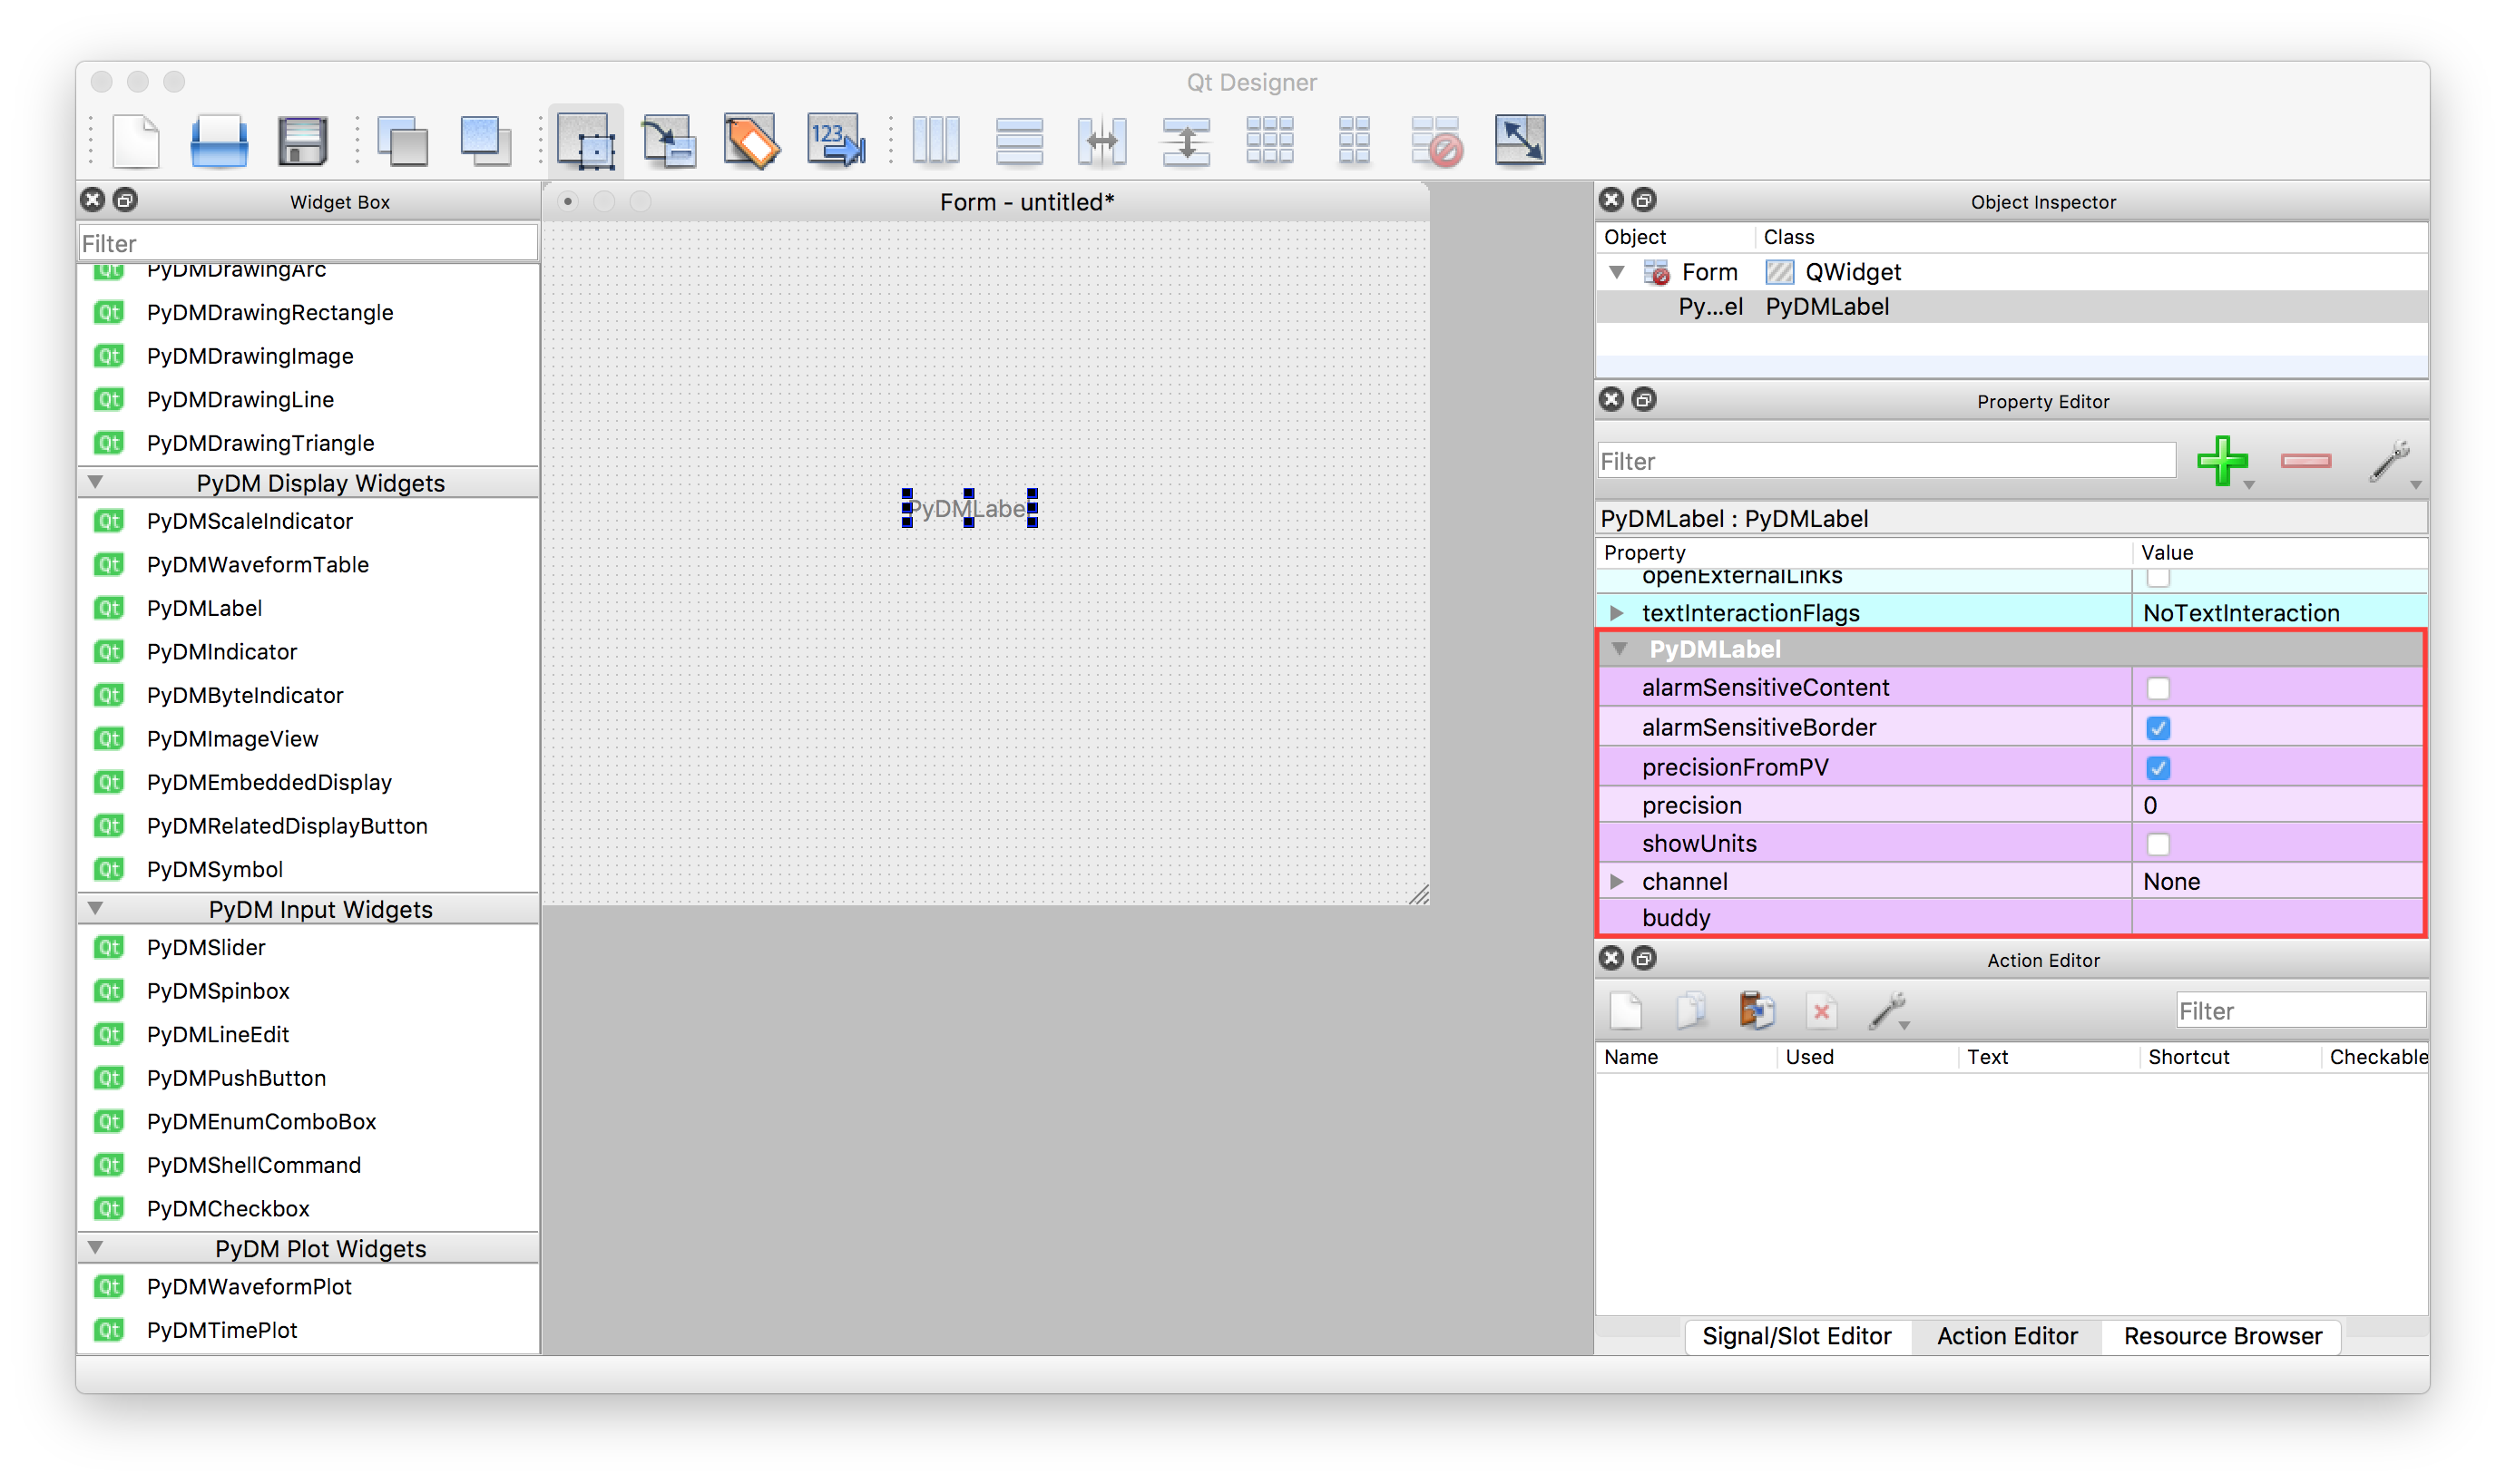
The PyDMLabel’s properties are highlighted in red.
Once you are done with the screen design, go to File->Save… and save the .ui file somewhere.
We can launch this screen with the following command:
$ pydm <path to your file>
for the .ui file you just saved. This will open your display in PyDM.